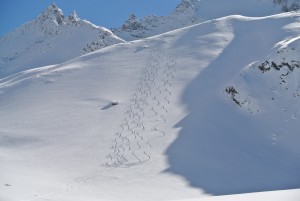
Of course we have all seen millions of ski movies. Over the years they have become part of our culture, they may even have been the motivation to make skiing a career! The likes of Glen Plake and Shane McConkey were the grandfathers of the ski movie, skiing peaks rarely climbed, let alone skied.
Now the ski movie is switching media to YouTube and Vimeo with riders like Candide Thovex kitted out with GoPros, doing incredible air time down single runs, popping off any available ridge or cliff and scaring the living daylights out of punters on the piste as they nonchalantly ski past.
It’s fair to say it’s more than impressive, watching what MSP and other production houses have to offer these days. But it’s refreshing when a new concept film is produced that just has a bit more of a story to it.
So the latest production from Timeline Missions under the direction of local Guido Perrini, La Liste, defiantly changes your perspective. Based around free skier Jeremy Heitz’s crazy challenge to ski fifteen 4,000 meter peaks in Switzerland in two ski season.
Yer so what no biggy right? Um, no…They all have an average slope of 50-55 degrees….Yer but they’ve all been skied before? Yep that is true, a fair amount of them by Sylvain Saudan, the crazy Frenchman in the 1960s. But he spent the whole day descending them with jump turns which, let’s face it, is the correct way to get down! Jeremy, simply GS turns the lot, hitting bone-splitting speeds of 70mph.
I can only say it sends shivers down your spine. This film is real, raw and staggeringly shot.
Click here for the full movie….Or take a look at the teaser below….
La Liste TEASER 1 from TimeLine Missions on Vimeo.
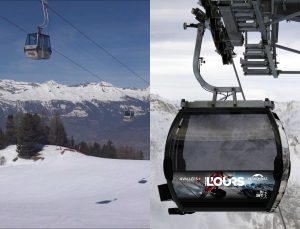
New Ski lift in Veysonnaz – Piste de L’Ours new 8 man gondola
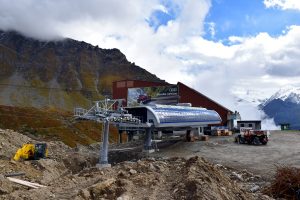
We are all very excited to hear that TeleVerbier are to upgrade the old 4 man chair in La Chaux to a shiny new fast 6 man, as reported recently on Verbier.com. This will indeed make a difference to those who have outgrown Les Esserts and want a fat lunch in Le Dahu.
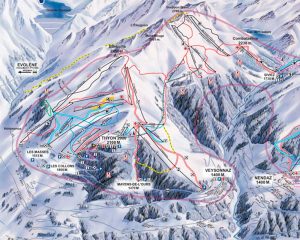
But the real game changer is happening over in the 3rd Valley, Veysonnaz. A couple of years go TeleThyon upgraded the old gondola from Veysonnaz town to Thyon. Not only did it reduce the time by about 7 minutes, the wonders of automatic doors meant that you no longer needed a lift assistant to lock you into the tin can and another to release you at the top..!
This year it the turn of the Piste de L’Ours. Described by a French downhill skier as ‘the most beautiful piste in the world’ the Bear piste is a steep, long and undulating piste lined by trees. It is the scene of many FIS World Cup downhill competitions over the years. Although the lift used to be the fastest in Europe in 1981, it certainly isn’t now with a bottom to top time in excess of 15 minutes. The new Piste de L’Ours gondola will halve the time which means you will have time to do at least 2 thigh burning runs of the FIS downhill before a well earned lunch at the Le Bois Sauvage in Les Masses.
Kids – Get them skiing!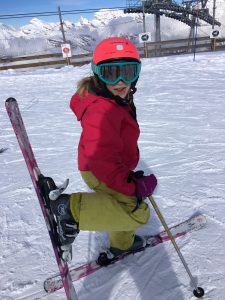
When can they start skiing, what is the best age, what equipment should they have, how do i dress them, what if they need a pee in the middle of the ski lesson, and many other things you have wondered about when going on a ski holiday?
Here is some advice from the experts.
What age can my child start skiing?
Three years old is usually a good age to start the little ones. But it is good to know that it differs from child to child, some children might have to wait a little bit and some kids will just fly down the slopes.
What do I do if my child is upset and crying at ski school drop off and doesn’t seem to want to go skiing?
We have seen many examples of how parents deal with such situations – some deal with it better than others.
For example we have seen everything from parents skiing next to their child for the entire lesson, to the parents who just drop them off and disappear with out even saying hello.
We would suggest somewhere in between…
For the first lesson it is best if the parents stay for a little while to help ensure a smooth introduction between their child and the instructor. For this to happen we ask that when the lesson begins they watch without being seen.
There are some children who will continue to cry at drop off for the duration of the booking, but please rest assure that the tears are short lived and as soon as the the lesson gets underway it is all smiles, skiing and hot chocolate
And let us not forget about those equally as nervous and worried parents as they send there little skier of for the first time. In some cases it may well be the first time parents leave their kids to any third party, so of course we understand that they want to be involved in the whole thing.
What do you do if a child gets upset in the middle of the lesson?
If children gets upset in the middle of a lesson we comfort them, of course, but we also try to encourage them and to build there confidence for the next lesson.
How do you teach the youngest children to ski?
With the youngest children (3-4 years) it is mostly about play and having fun on the snow. We aim to do this with the skis on as much as possible, but we usually need to mix it up. This is especially true for the first few lessons were we focus on a lot of games to build trust and build basic skills. With the youngest skiers it is all fun and showing them the movements as they are incredibly good at imitating and copying.
How many kids do you recommend with one teacher?
For the youngest kids, the 3 year olds, maximum 2 in a group.
If the kids are between 4-6 years old you can have up to 3-4 kids in a group.
Older kids can usually handle being 5-6 in a group as long as they are of similar level.
How much skiing can kids do in a day? Is it enough with a morning lesson or can they ski all day?
This varies from kid to kid but from 7 years and up most kids can do a full day. The instructor will make sure they get a little refuel between lunch and the end of the day and that usually does the trick.
Should they wear thick sweaters, several thin shirts, fleece or wool cardigan, overalls or two piece. How do i dress the kids so they are warm, but comfortable when they hit the slopes?
Basic rule: No cotton closest to the body. It gets damp when you get sweaty and consequently makes the children cold. This goes for ski socks as well, Make sure they wear really high ski socks that will go over the edge of the boot.
Don’t put to much clothing on your child, they are working hard and moving a lot -they will get hot! Also, keep in mind that just because there is snow out there doesn’t mean its freezing. Instructors often see kids wearing clothing that would be enough for 20 degrees below zero! … But it’s April, zero degrees and the sun is shining.
Overalls are practical and often cheaper. Fleeces are great as they are warm, quick drying and easy to take off if it gets too hot. Another good tip is to buy good quality mittens and a thin balaclava to wear under the helmet, a hat is usually to bulky.
If you follow these simple guidelines both you and your children will have the best holiday ever, and you will have created a new excited generation of skiers.
See you on the slopes!
Before heading to the slopes make sure you check the snow reports. There are many ‘apps’ you can get on your smart phones like ‘YR.no‘ a Scandinavian weather report system or you can use snow-forecast.com on the Internet for a detailed broadcast of the weather of your desired holiday week. Although these reports tend to be very accurate it’s a good idea to make sure you check everyday whilst taking into account how active you will be, when making a decision on what to wear!
When it comes to layering your clothes we start with the base layer! This is important, you need a tight fitting garment with moisture transfer properties such as wool, silk, polyester. The brand us performance instructors love though is Dhu performance cashmere! They provide products for both activity and warmth. As a natural wool, cashmere is hydrophobic (can repel water), flame resistant and can absorb UV radiation – an insulation layer that provides warmth in cold conditions but can also keep you cool in warmer conditions! This will provide some more insulation. The best thing about these materials is that they will keep moisture away from the body even when you are working hard and sweating!
Next up is your mid-layer. Choose something a bit looser fitting, with either a fleece, wool or synthetic fiber for insulation.
Lastly your outer-layer should be a material which allows moisture to escape but also be waterproof and windproof garment such as Gore-tex. Its also a great idea to make sure this has vents which you can unzip to allow the moisture to escape more easily!
Now chuck your skis on and have a safe, warm enjoyable day 🙂 Caroline
My top 5 tried and tested exercises to help the muscles and joints get fired up and ready for your ski holiday.
I like to perform these exercises in a HIIT form (High Intensity Interval Training) doing as many as I can in 30 seconds then resting for 30 seconds and repeating 4 to 5 times, you can do this with longer rest times if needed e.g. 30 seconds of work and 60 seconds of rest, or just repeating each exercise 5 times with good form.
Ski Jumps – Stand with feet hip-width apart, with arms in front of you, drop low in the hips, raise your right foot and bring it behind the left leg, take a wide jump to the right, land with the right leg in front and the left leg crossed behind it, repeat, jumping back and forth.
To make the exercise harder you can jump with a medicine ball or add in a single leg squat when you land.
Squat Jumps – Squat with feet shoulder-width apart, jump up, raising your hands up in the air, land softly in the squat and repeat.
To make the exercise harder land lower in your squat and hold for a few seconds before jumping again.
Plank walks – In the forearm plank position walk up on to your hands and the back down on to your forearms, keeping your core tight and making sure not to sway in the hips, repeat.
Any Plank variation exercises – Planks saws, Plank pikes, Spider planks, etc.
One leg squats – Standing on one foot, squat down as far as you can and slowly rise, ensure your kneecap is facing forward throughout the squat, a good way to check this is to look to see if it is tracked over your second toe, repeat.
To make this exercise harder, try doing it on a cushion/pillow or wobble board if you have one.
Triceps Push Ups & Push Ups – Place your hands just under your armpits, making sure core is tight and your back is straight, keeping elbows tucked in just brushing your ribs, push up and down, repeat. Doing the same move but have hands about shoulder width apart for push ups.
Kate McBride
Ski instructor & Fitness guru
Heading off-piste?
Finally! The snow is here!
After a long a patient wait we are finally getting our fair share of snow. Televerbier have done a fantastic job maintaining the pistes so far this season but with all this new snow some of you may plan to venture into the natural and un-controlled terrain.
Skiing in the off-piste is a lot of fun and Verbier boasts some of the best freeride terrain in the Alps however, it can also be very dangerous. So before we go hooning off into the wilderness of powdery goodness here are a few things to consider.
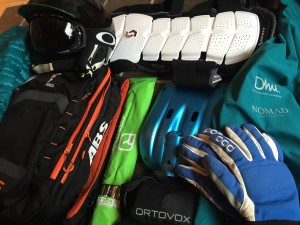
Avalanche safety equipment
If you are skiing off-piste you MUST have the following and this applies to all of the people you are with:
- Avalanche transceiver (with a battery that isn’t about to run out)
- Snow shovel
- Avalanche probe
(And a back pack to carry it all in)
These are the basic things you need to have with you. Treat them all as one and not three individual things – They all compliment each other and are all useless if you were missing one. Also, just because you own (or have rented) these three pieces of equipment I recommend you have some sort of training so you know how to use them all properly in an emergency situation – the correct and efficient use of this equipment could just save someone’s life!
With that said, would you really want to ski off-piste with people who had but didn’t know how to use this equipment? Your life is effectively in their hands.
I also recommend:
– A helmet
– Adequate clothing
– First Aid Kit
– Mobile phone (but do not carry it next to your transceiver as it can interfere with the signal your transceiver emits)
– Spare layer or fleece
– Some water or something to drink (not beers – that’s later in the Après ski)
– Having helicopter insurance
Optional safety equipment:
– Back protector
– Avalanche Airbag (e.g. ABS, Snowpulse etc)
– Avi-lung
The avalanche risk rating
This is the professionally decided rating on the average likelihood of triggering an avalanche. It takes into account the current amount, quality and bonding of the layers in the snowpack.
It can be found at any of the main lift stations on an information board (usually with a flashing light next to the corresponding number) Some of these locations are; one at the top of the steps as you walk up to get into the gondola at Medran and one in between the escalators and the walk to the turnstiles for the Funispace at Ruinettes.
The ratings are as follows:
1 – low risk
2 – moderate risk
3 – considerable risk
4 – high risk
5 – very high risk
I would recommend never skiing off-piste when the rating is a 4 or 5 and only if it is 1, 2 or 3. Having said that, most cases of people being involved in some sort of avalanche situation occur when the rating is a 3 – people think they will be safe as it is the ‘middle ground’ between 1 and 5. WRONG! Pay attention to what the number actually means and a 3 actually says considerable risk. You must take this into account. Avalanches also occur when the rating is a 1 too.
Taking part in a mountain safety course
This is optional but highly recommended extra training on top of your Transceiver, Shovel and Probe training.
There are many courses you can take part in – some are a few days and some are just a 3 hour morning session.
It can help you understand the off-piste in a lot more detail thus can help you minimise the chance of triggering an avalanche. As the saying goes, prevention is better than cure.
Things your course may include are:
- Use of safety equipment
- Understanding the snow pack
- Causes of avalanches
- Effects of weather
- How to assess the risk
- How to avoid avalanches
- Reading the terrain
Hire a guide
Hiring a mountain guide for the day really can be worth it. They know loads about the area and can show you some of the best off-piste skiing Verbier has to offer.
They can also help you find some of the best snow around that you may have otherwise missed if you headed off-piste with just you and your friends.
Most importantly, they can help keep you safe by using their invaluable mountain knowledge, experience in reading the terrain and understanding the snow pack.
Some final points
Here are a few final points to take away with you.
Never ski off-piste alone – This is a no brainer right? I mean, if something happened and no one is there to help you this would be a pretty bad situation.
All the gear and no idea… – Have appropriate training with your Transceiver, Shovel and Probe and know what to do in an emergency. I cannot stress how important this is. I don’t mean to go away on a 3 week training expedition but some sort of course, training or practice with your equipment would be a good idea.
And also,
If in doubt, don’t – Not sure that face or couloir you have been eyeing up for a while is safe at the moment? Then don’t do it. Ski somewhere else. There will always be another day.
Stay safe, enjoy.
Lawrie
